

101.1. Get started with TOPCAT#
For the API Aspect of the Rubin Science Platform at data.lsst.cloud.
Data Release: Data Preview 2
Last verified to run: 2026-08-07
Learning objective: This tutorial provides a basic guide to set up TOPCAT to explore DP2.
LSST data products: Object table
Credit: Originally developed by the Rubin Community Science team. Please consider acknowledging them if this tutorial is used for the preparation of journal articles, software releases, or other tutorials. DOI: 10.11578/rubin/dc.20250909.20
Get Support: Everyone is encouraged to ask questions or raise issues in the Support Category of the Rubin Community Forum. Rubin staff will respond to all questions posted there.
1. Create an RSP access token.
See the Creating user tokens webpage
for a step-by-step guide for creating an RSP access token. It is recommended that the token you create has the
following properties: a name that includes “TOPCAT” as a substring, a scope of read:tap,
and no expiration date. The token will only be visible once.
You must cut-and-paste the token to a secure file for future use.
A new token is not needed for every TOPCAT session; the token can be reused, but it must be kept secure.
Important
Note that tokens should be treated like passwords: they should not be shared with others. Take precautions to keep tokens secure. Never store tokens in git-tracked files.
2. Start TOPCAT.
See TOPCAT homepage for download and install instructions.
3. Open TAP Query.
Click on “Table Access Protocol (TAP) Query” under the “VO” menu, this will open up a separate Table Access Protocol (TAP) Query window.
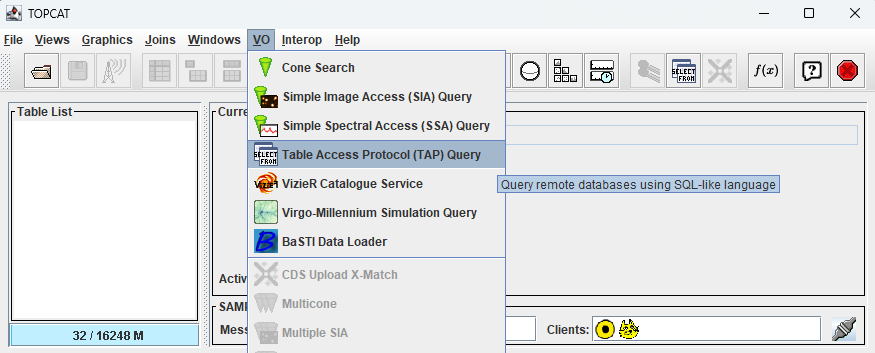
Figure 1: The main TOPCAT window, with the “VO” menu pulled down and the “Table Access Protocol (TAP) Query” highlighted.#
4. Add DP2 TAP URL.
In “TAP URL”, at the bottom of the window, use the DP2 TAP service address https://data.lsst.cloud/api/tap, then click the “Use Service” button.
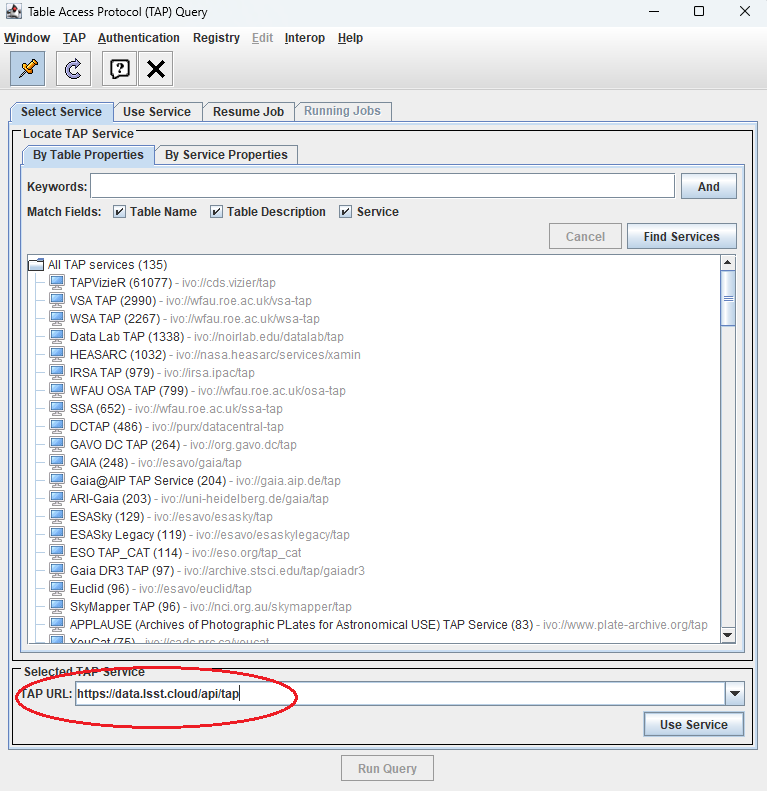
Figure 2: The Table Access Protocol (TAP) Query window with the location of the “Selected TAP Service” panel indicated by a red oval.#
5. Populate the “Authenticate” window.
For “User” add x-oauth-basic and for “Password” and security token created in Step 1, then click “Authenticate”.
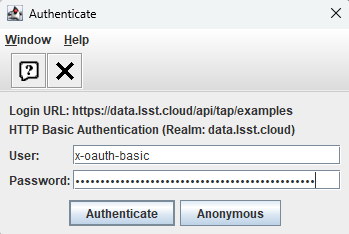
Figure 3: The Authentication window with the values for the user and the password filled in.#
6. RSP TAP service is now accessible from TOPCAT.
A list of available DP2 tables now appears in the TAP Query window’s Metadata panel. Note: Under TAP service, the file structure may list dp02 and dp1 catalogs first. DP2 tables can be found by collapsing those folders or using the scroll bar.
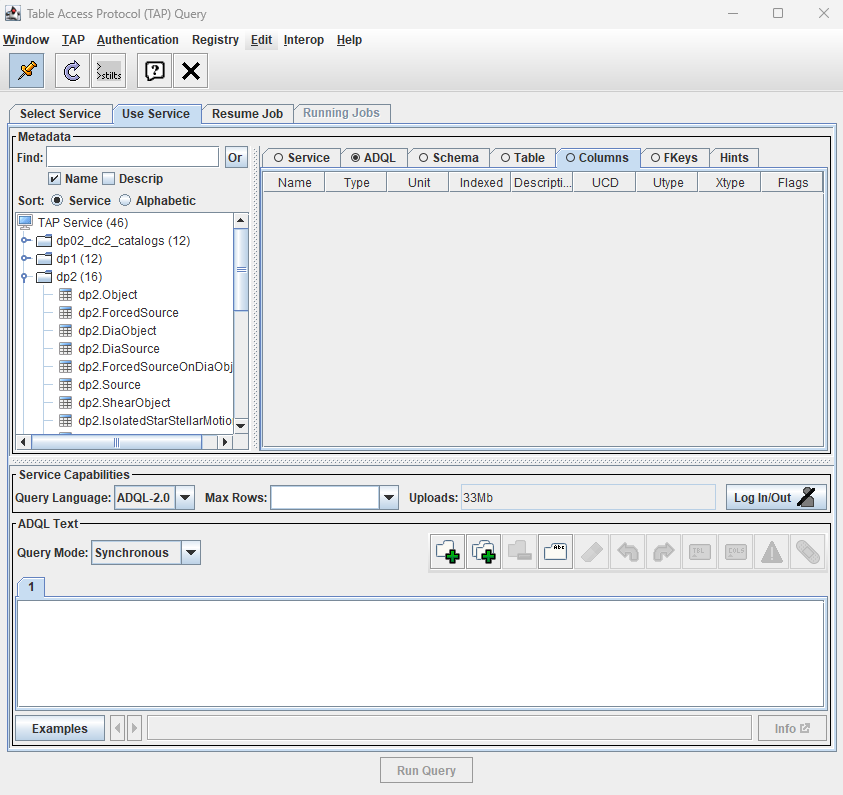
Figure 4: The Table Access Protocol (TAP) Query window; a list of DP2 tables available for query can be seen in the Metadata panel.#
7. Click dp2.Object table.
In the left Metadata panel of the Table Access Protocol (TAP) Query window, click on the dp2.Object table. Then, in the right Metadata panel, click the “columns” tabs to change the view. Note that the column names, data types, units, and descriptions for the columns of the dp2.Object table are shown.
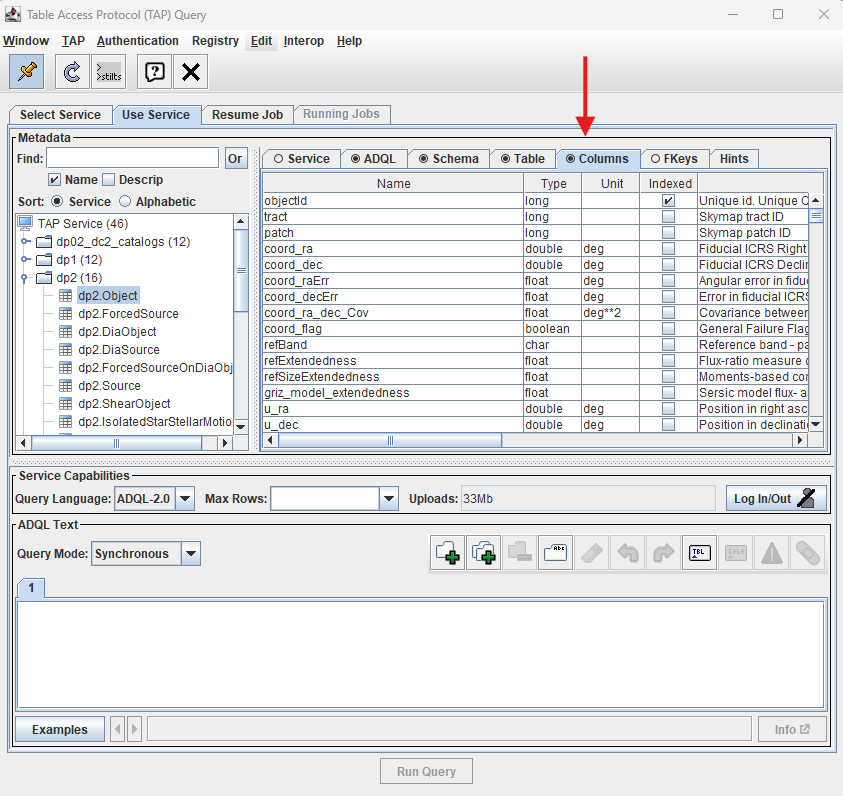
Figure 5: The Table Access Protocol (TAP) Query window as in Figure 4, with dp2.Object table and column names, data types, units, and descriptions for the columns shown in the right-hand Metadata panel.#
8. Explore sample Astronomical Data Query Language (ADQL) queries.
Within the ADQL Text panel of the Table Access Protocol (TAP) Query window, select the Examples button located at the lower left and choose Full Table from the Basic menu. A sample ADQL query will be displayed in the text box. Figure 6 demonstrates a query that retrieves the top 1000 entries from the dp2.Object table.
Warning: This type of query is generally not recommended for routine use, as some tables contain a large volume of data. The queries provided in the Examples menu are intended as starting templates and should be adapted within the ADQL text box to meet specific requirements, or replaced with a predefined query (such as the one presented in Step 9).
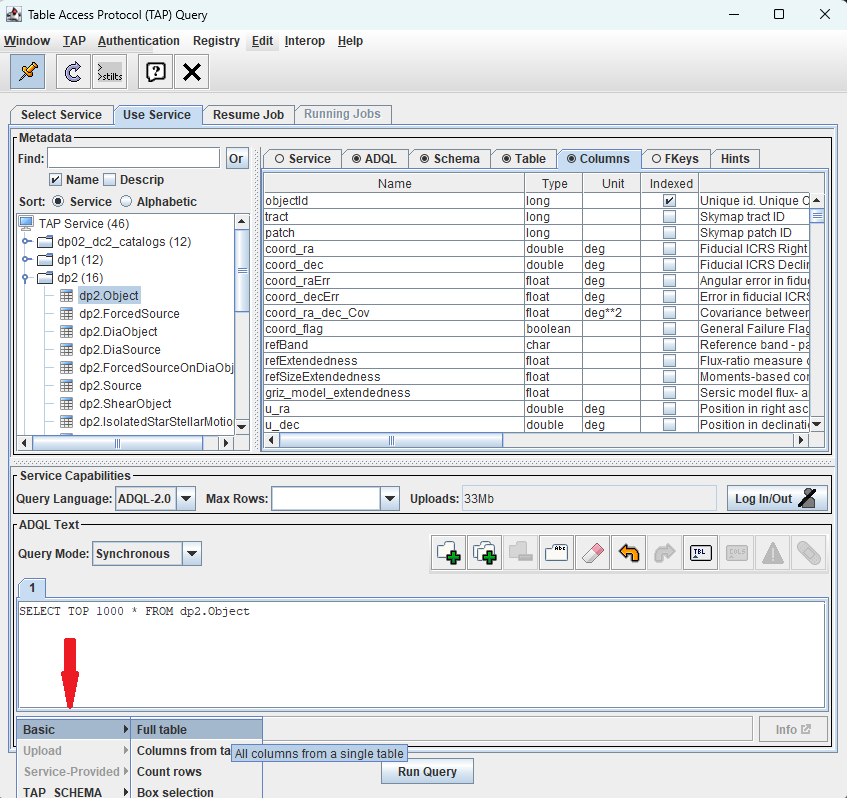
Figure 6: The Table Access Protocol (TAP) Query window as in Figure 5, with the Basic/Full Table menu query shown.#
9. Construct appropriately constrained query.
Because the dp2.Object table is large, it is good practice to always include spatial constraints and only retrieve necessary columns.
The ADQL code block below searches for objects within 0.5 degrees of the center of the Extended Chandra Deep Field South (ECDFS) field, RA, Dec = 53.13, -28.10 and retrieves g-band and r-band PSF magnitudes.
Copy the code block below and paste it into the ADQL text box, then click “Run Query”. The query could take a few seconds to execute.
SELECT objectId, coord_ra, coord_dec,
       g_psfMag, r_psfMag
FROM dp2.Object
WHERE CONTAINS(
          POINT('ICRS', coord_ra, coord_dec),
          CIRCLE('ICRS', 53.13, -28.10, 0.5)
      ) = 1
  AND g_psfMag IS NOT NULL
  AND r_psfMag IS NOT NULL
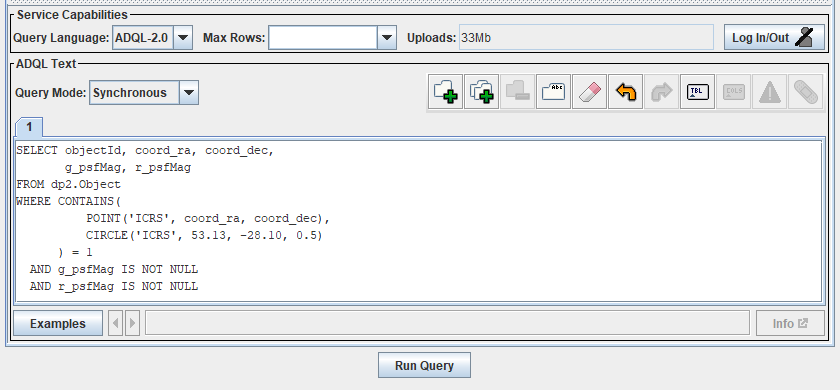
Figure 7: The Table Access Protocol (TAP) Query window as in Figure 5, with the code block in the ADQL Text box.#
10. New table has appeared in main TOPCAT window.
Note that a new table, TAP_1_dp2.Object, has appeared in the Table List panel of the main TOPCAT window.
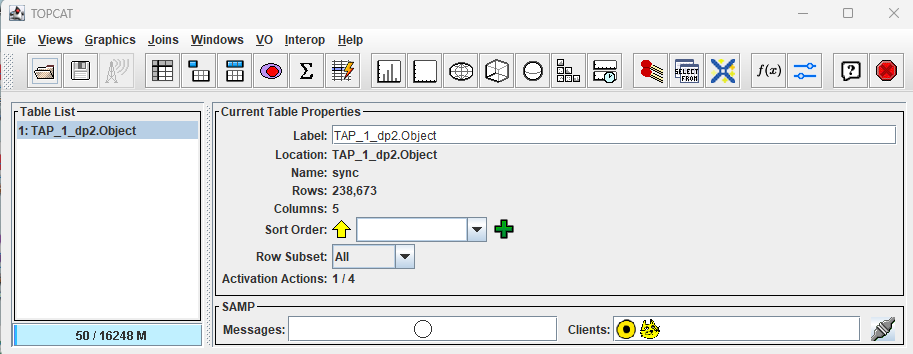
Figure 8: The main TOPCAT window with a new table, TAP_1_dp2.Object, appearing in the Table List panel.#
11. Explore the table.
To view the table of results, find the “Table List” panel of the main TOPCAT window, select table to view (in this instance only one table is available), then click on the “Display table cell data” icon (see Figure 9 red circle).
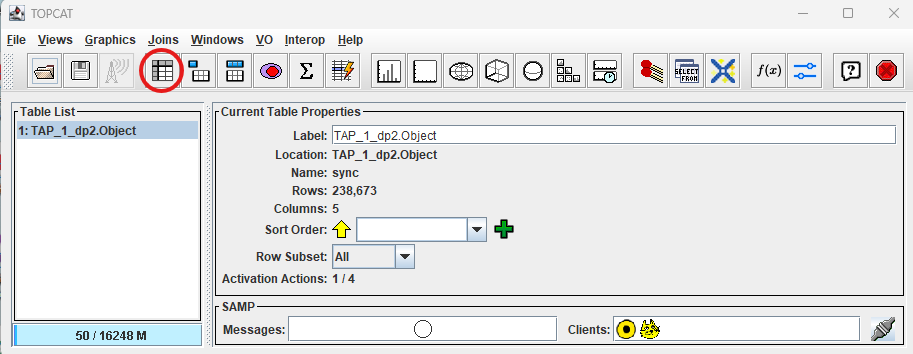
Figure 9: “Display table cell data” icon indicated by a red circle.#
12. View the contents of the TOPCAT Table Browser window.
This particular table contains 238,673 rows and 5 columns. Vertical and horizontal scrollbars in this window permit viewing the full contents of the table.
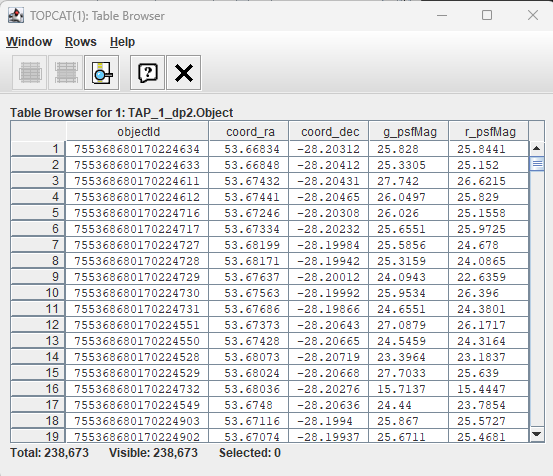
Figure 10: The Table Browser Window, showing the contents of the newly created table.#