

101.3. View images with SIA, TOPCAT, and DS9/Aladin#
Data Release: Data Preview 2
Last verified to run: 2026-08-10
Learning objective: This tutorial provides a basic guide to using TOPCAT with the Simple Image Access (SIA) protocol and sending images directly to SAOImageDS9 and Aladin to explore DP2 image data.
LSST data products: deep_coadd images
Credit: Originally developed by the Rubin Community Science team. Please consider acknowledging them if this tutorial is used for the preparation of journal articles, software releases, or other tutorials. DOI: 10.11578/rubin/dc.20250909.20
Get Support: Everyone is encouraged to ask questions or raise issues in the Support Category of the Rubin Community Forum. Rubin staff will respond to all questions posted there.
1. Open TOPCAT and SAOImageDS9 or Aladin.
See API Tutorial 101.1 for instructions on how to access Rubin DP2 data with “Tool for OPerations on Catalogues And Tables” (TOPCAT). Obtain an authentication token that includes read: image. Follow download and install instructions at DS9 and Aladin download. Screenshots for this tutorial were generated on a Windows computer using TOPCAT Version 4.10-7, SAOImageDS9 Versions 8.6, and Aladin (v 12.060). Access to image‑retrieval features may depend on running an up‑to‑date version of these software programs and problems encountered during the workflow may be related to installation version or outdated software. The steps within TOPCAT for viewing an image in ds9 or Aladin are identical; the only difference is which viewer is opened at the start of the tutorial.
Open TOPCAT (minimum v4.10-4) and DS9 or TOPCAT and Aladin software programs.
2. Verify TOPCAT and DS9 or TOPCAT and Aladin are open and communicating.
On the TOPCAT menu bar, click Interop, SAMP Status (Figure 1) to verify TOPCAT and DS9 (or TOPCAT and Aladin) are connected. Note: for this tutorial, ds9 was used to generate all screenshots, except for section 4 where an image is displayed in Aladin. As stated before, TOPCAT commands are identical for either option.
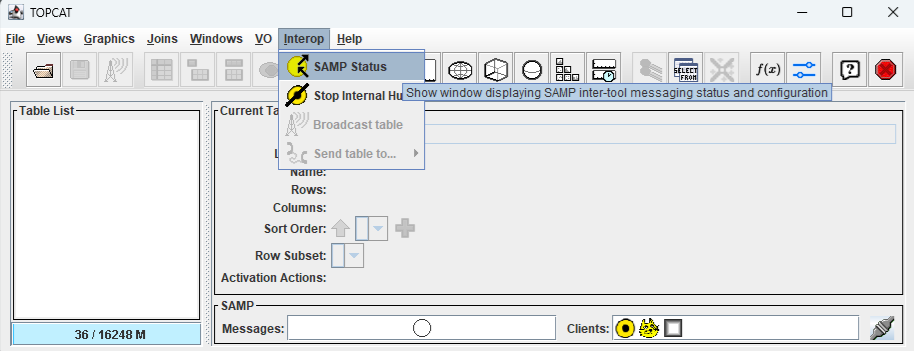
Figure 1: TOPCAT window with Interop menu item selected.#
A pop up window will open (Figure 2) showing SAMP Control active clients: Hub, topcat, and ds9, or Hub, topcat, and Aladin (depending on which software package was used). This step will verify TOPCAT can send information to ds9 or Aladin.
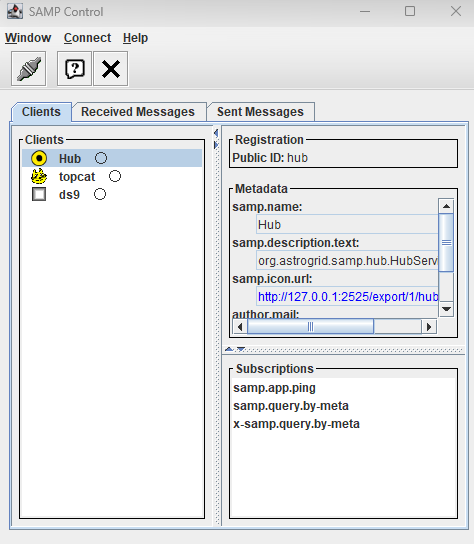
Figure 2: SAMP Control window showing DS9 client is active.#
If clients are active, no action is needed. Close SAMP control window by clicking the “X” in the upper right-hand corner of the window.
2.1 Start a Simple Image Access (SIA) Query.
In the main TOPCAT window, click the VO menu item, then select Simple Image Access (SIA) Query.
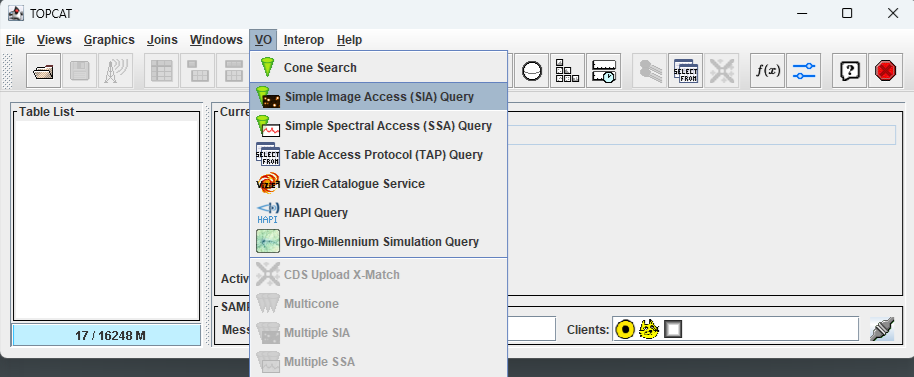
Figure 3: Open a SIA query dialog box.#
2.2 Input search parameters.
At the bottom of the window, in the SIA Parameters (Figure 4) section of the Simple Image Access (SIA) Query window:
add https://data.lsst.cloud/api/sia/dp2/query into SIA URL:
Change SIA Version: to 2.0 by using the drop down menu
Input 53.076 degrees into the RA: box and -28.110 degrees into the Dec: box (coordinates for the ECDFS field)
Change Angular Size: to 0.5 degrees
Click “OK”
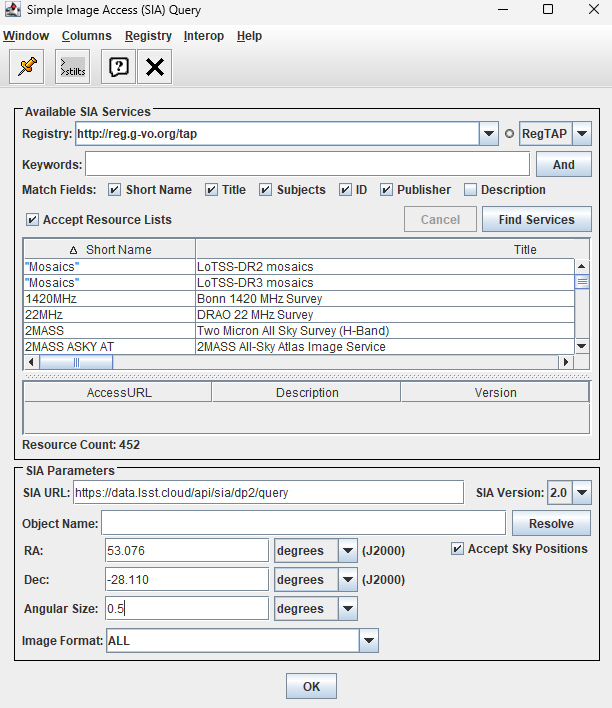
Figure 4: Open a SIA query dialog box with appropriate SIA Parameters.#
2.3 Add authentication credentials.
Add the credentials created during API Tutorial 101.1, “Get started with TOPCAT”, linked above (Note: click Creating user tokens webpage for instructions to get a token and create a token with “read:images”). Press Authenticate (Figure 5).
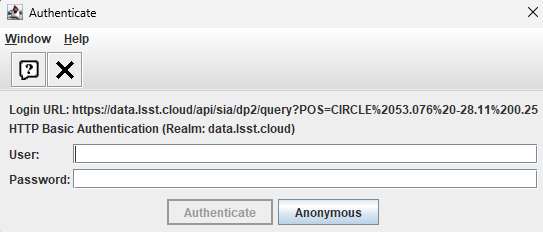
Figure 5: Add authentication information obtained from tutorial “101.1 Get started with TOPCAT”.#
2.4 TOPCAT will load a DP2 SIA table.
TOPCAT will retrieve a table called SIA-30m (Figure 6). The table retrieved by TOPCAT has 132 rows and 37 columns.
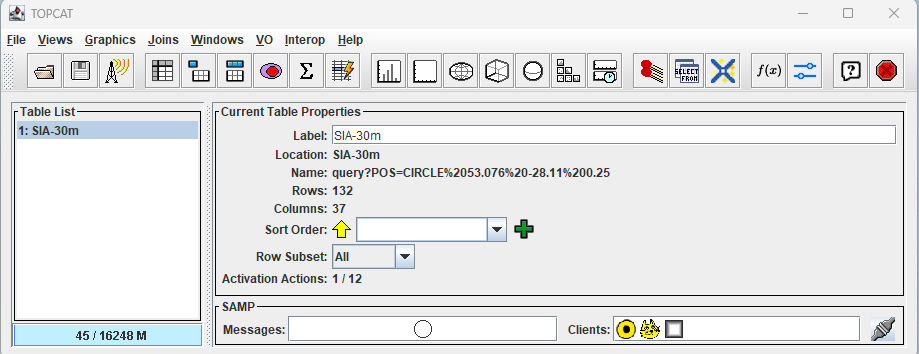
Figure 6: Main TOPCAT window with data table loaded.#
2.5 Tell TOPCAT how to send data to ds9.
Click the “Display actions invoked when rows are selected” button (resembles a ladder with a lightning bolt, red circle in Figure 7), to open the TOPCAT: Activation Actions window.
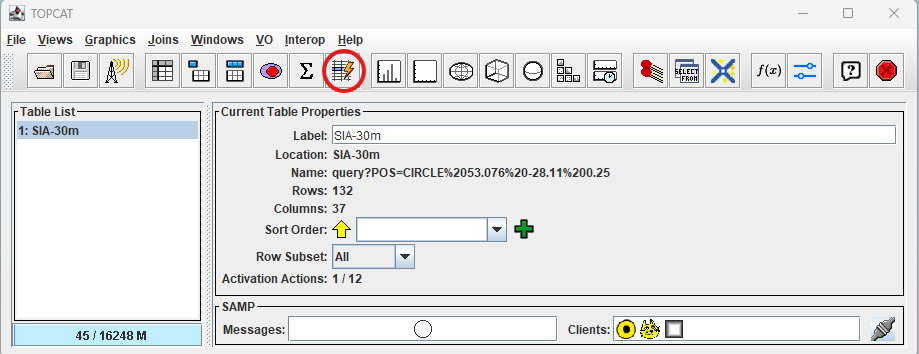
Figure 7: Click Display actions invoked button to open the activation actions window.#
2.6 Click View URL.
Click the “View URL” option (Figure 8). (Note: older versions of TOPCAT might need to use “Send FITS Image” or “View Datalink Table” options).
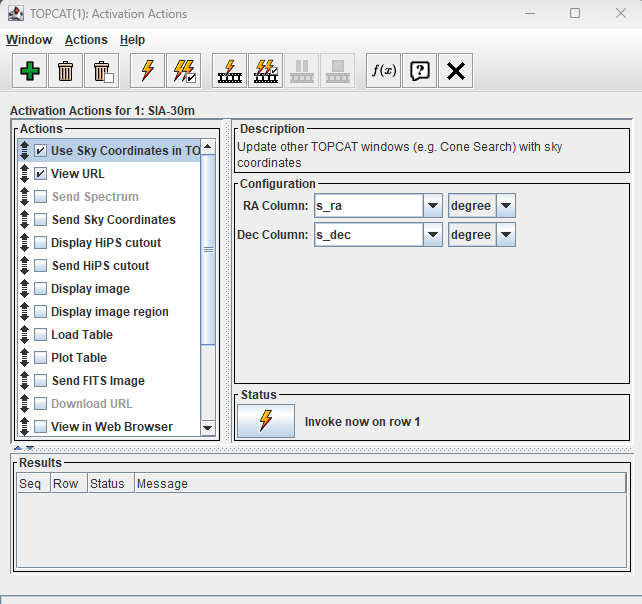
Figure 8: Click View URL.#
2.7 Click Display table cell data.
Click on the “Display table cell data” button (Figure 9) to open the TOPCAT: Table Browser window (Figure 10).
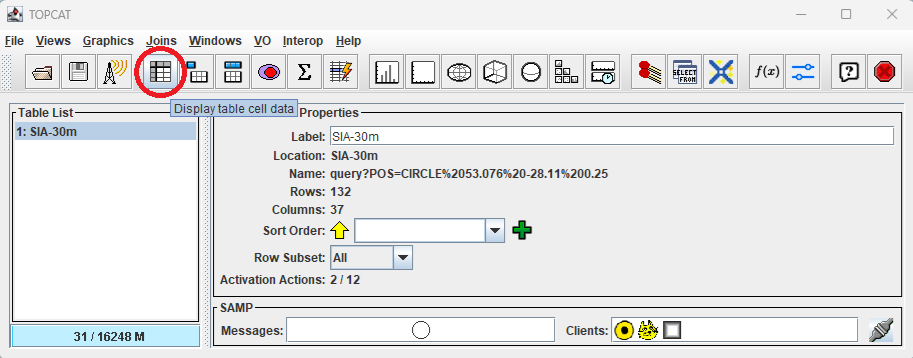
Figure 9: Click Display table cell data button to open the TOPCAT: Table Browser.#
Once the TOPCAT: Table Browser window (Figure 10) opens, click on row 1 to select an image.
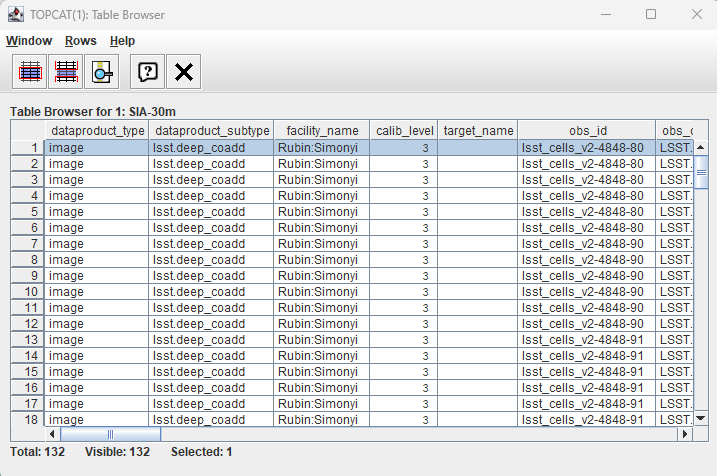
Figure 10: Click a row to select an image and to open the View Datalink Table window (see Figure 11).#
2.8 Click Send FITS Image from the Action: drop down.
Within the “View Datalink Table” window, click the dropdown menu for Action: (located at the bottom of Figure 11). Select “Send FITS Image”, then click “Invoke”.
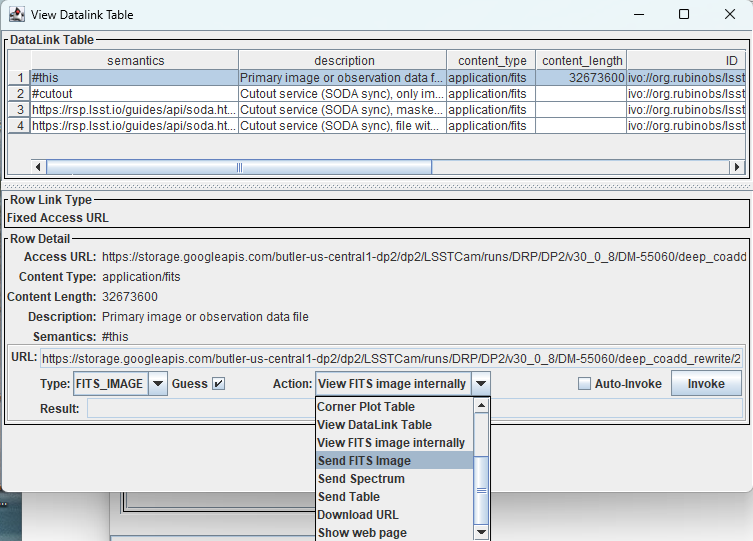
Figure 11: Use the Action dropdown menu and select Send FITS Image.#
3. Image sent to ds9, change scale to view.
After clicking “Invoke” and a brief retrieval delay, the image is forwarded to ds9 for display.
Note: To improve image visibility, scale may need to be changed to zscale (Figure 12).
Clicking on additional rows in the TOPCAT: Table Browser window will open additional images if Auto-Invoke is selected.
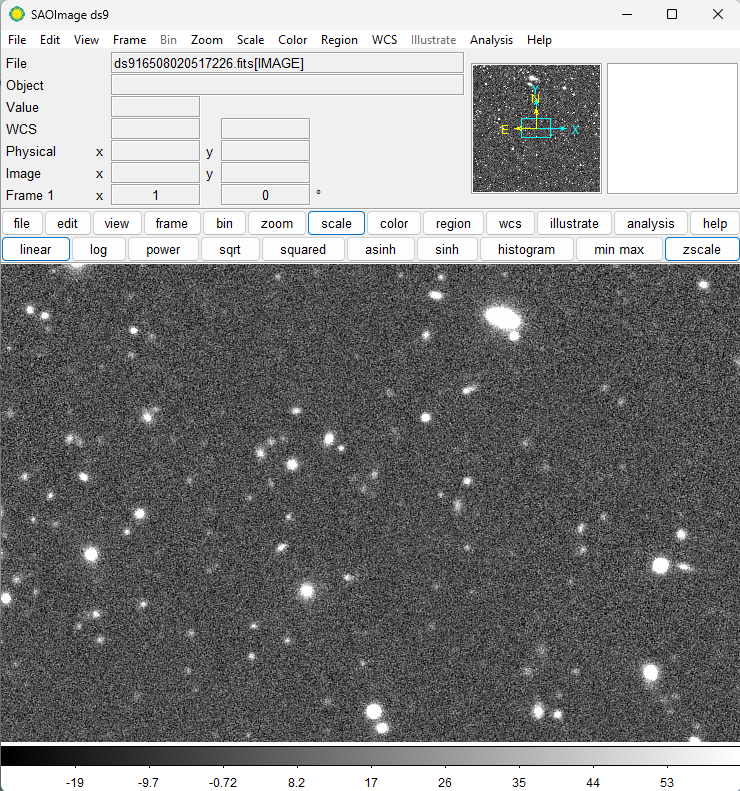
Figure 12: Click scale and zscale in the ds9 window to view the image.#
4. Image sent to Aladin.
If using Aladin for image display, after completing step 2.8 (listed above), the following image will appear in Aladin (Figure 13). Use Aladin controls to scale or zoom within the image.
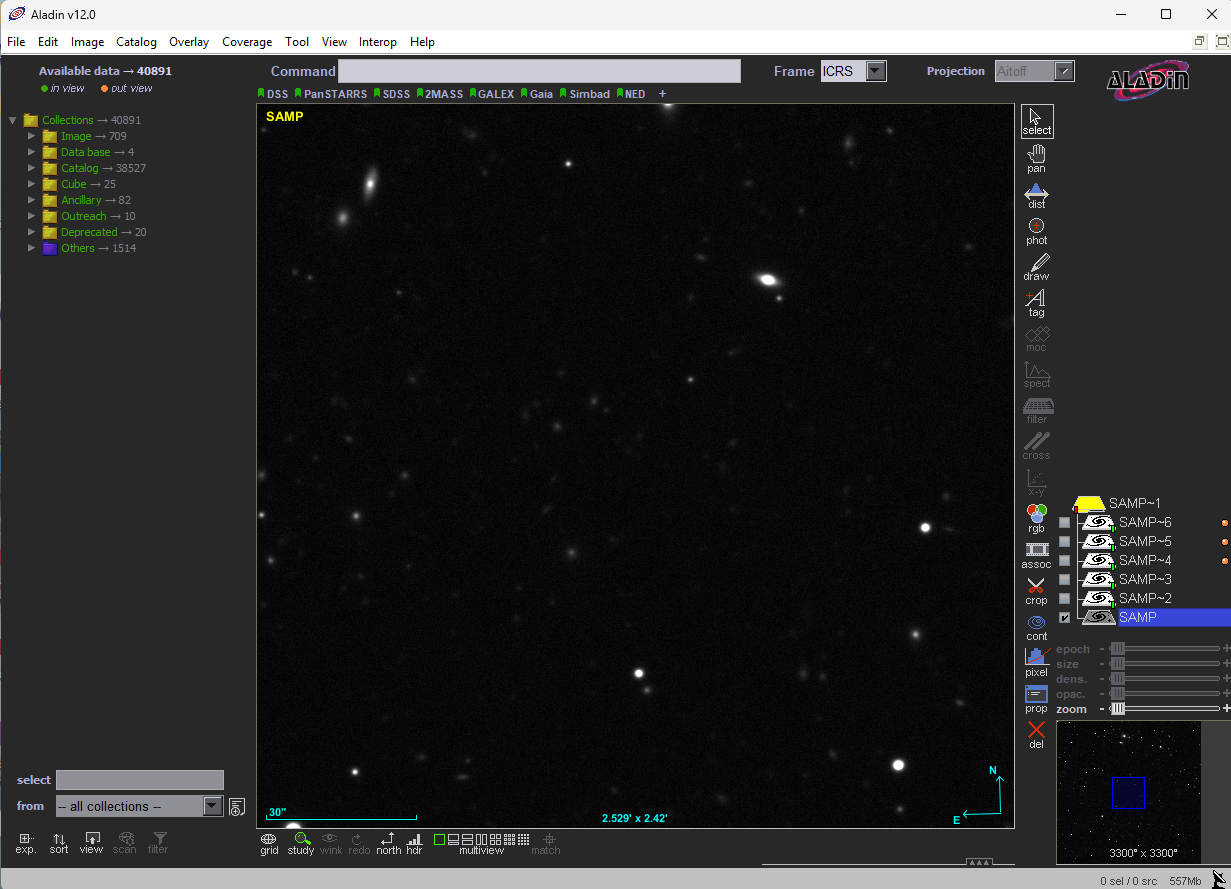
Figure 13: DP2 image displayed in Aladin.#