

106.2. Use query results as user uploads for cross-matching#
For the Portal Aspect of the Rubin Science Platform at data.lsst.cloud.
Data Release: Data Preview 2
Last verified to run: 2026-09-10
Learning objective: How to use TAP query results as a custom table in a subsequent query.
LSST data products: Object table
Credit: Originally developed by the Rubin Community Science team. Please consider acknowledging them if this tutorial is used for the preparation of journal articles, software releases, or other tutorials. DOI: 10.11578/rubin/dc.20250909.20
Get Support: Everyone is encouraged to ask questions or raise issues in the Support Category of the Rubin Community Forum. Rubin staff will respond to all questions posted there.
1. Log in to the RSP and enter the Portal Aspect. In a web browser go to data.lsst.cloud, select the Portal Aspect, and log in.
2. Select Multi-archive TAP tab. On the Portal landing page, click on the menu icon (three horizontal lines at upper left) to open the sidebar menu. Under “Other archive searches,” select “Multi-archive TAP” if it is not already in your default tab list.
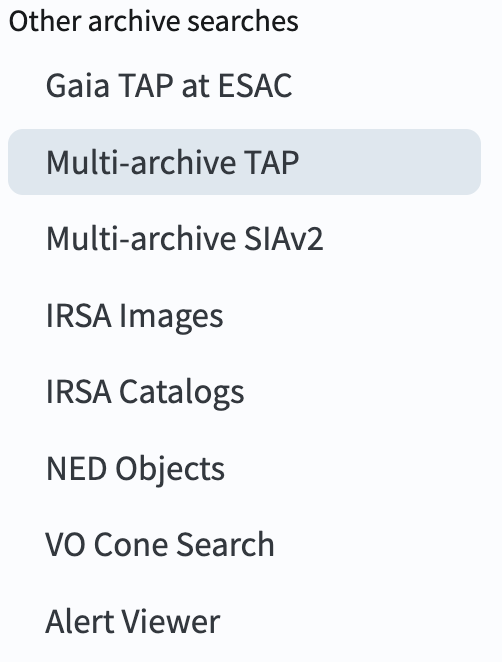
Figure 1: A portion of the sidebar menu in the Portal Aspect, showing available options for archive searches.#
3. Query using Gaia TAP service.
Select the Gaia TAP service from the drop-down menu next to “Select TAP service” near the top left and ensure gaiadr3.gaia_source table is selected from the “Tables” drop-down menu. Under the “Spatial” section, as an example, enter “225, -40” for coordinates and set the search radius to 0.5 degrees. At the bottom left, click the blue button named “Search”.
4. Upload the TAP query result as a custom table. In the results interface, click the “Actions” icon (circled in Figure 2) and select the “Use table as an upload to TAP search” option.
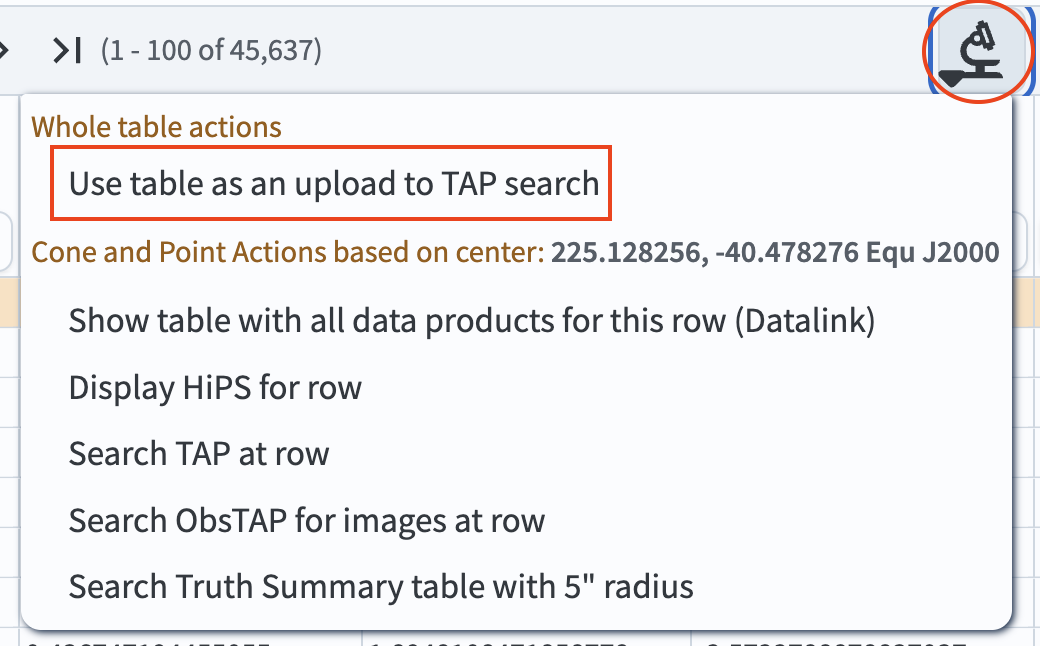
Figure 2: A screenshot showing available action items when clicking the “Actions” icon.#
5. Switch to the Rubin TAP service.
Once the query result is successfully uploaded as a custom table, the result interface is switched to the “Multi-archive TAP” tab and the custom table appears under the “Spatial” section. Switch to the Rubin TAP service by selecting “Rubin Tap” from the drop-down menu and ensure the Object table is selected.
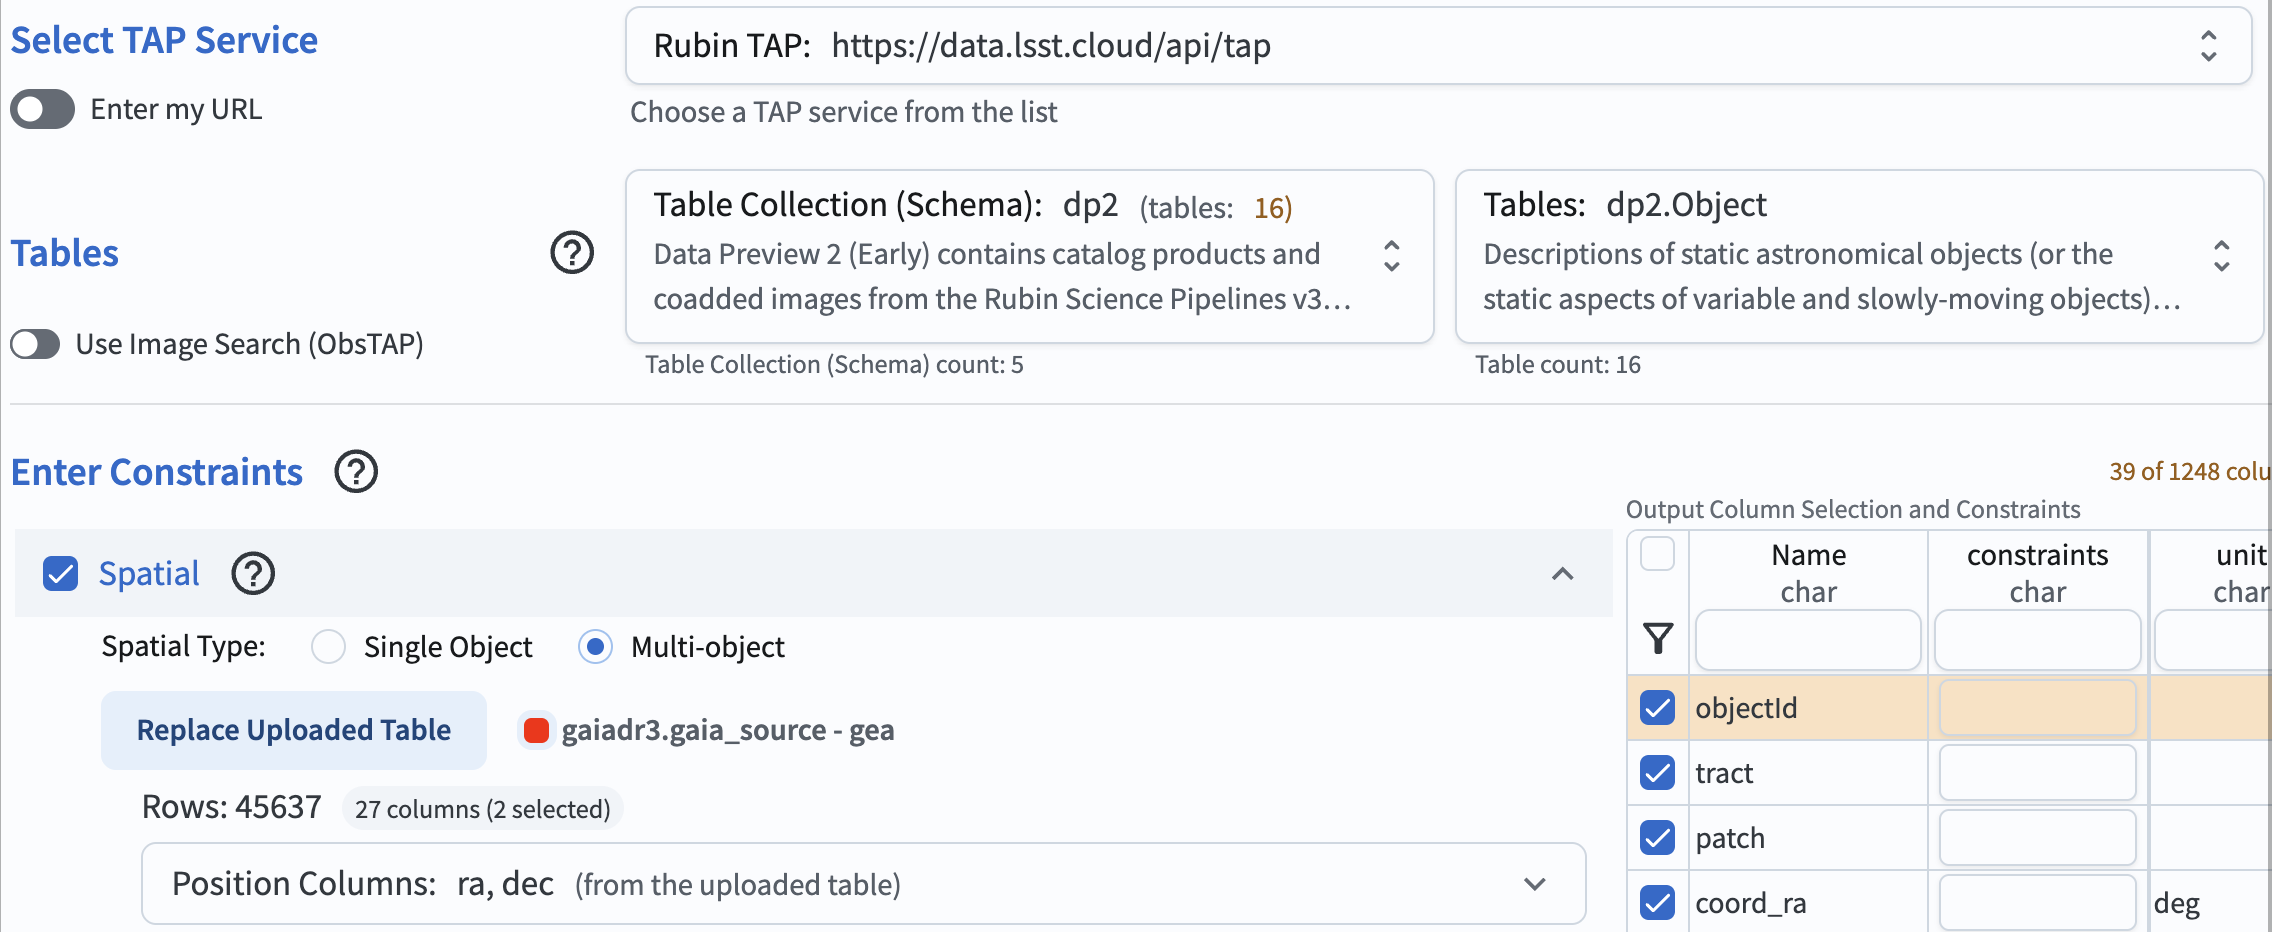
Figure 3: The expected view of the Portal interface following the successful upload of a custom table and selection of the Rubin TAP service.#
6. Use the custom table in a new TAP query.
Under the “Spatial” section, ensure the position columns are set to ra and dec for the uploaded table, and coord_ra and coord_dec for the DP2 Object table. Set the search radius to 1 arcsecond to define a cross-matching tolerance. To include the photo_g_mean_mag and br_rp columns from the uploaded Gaia table in the final output, click the highlighted part next to “Rows: 45637” (circled in Figure 4). Select the two photometry columns from the pop-up window, and click “OK”. Finally, click “Search” in the lower-left corner of the page.
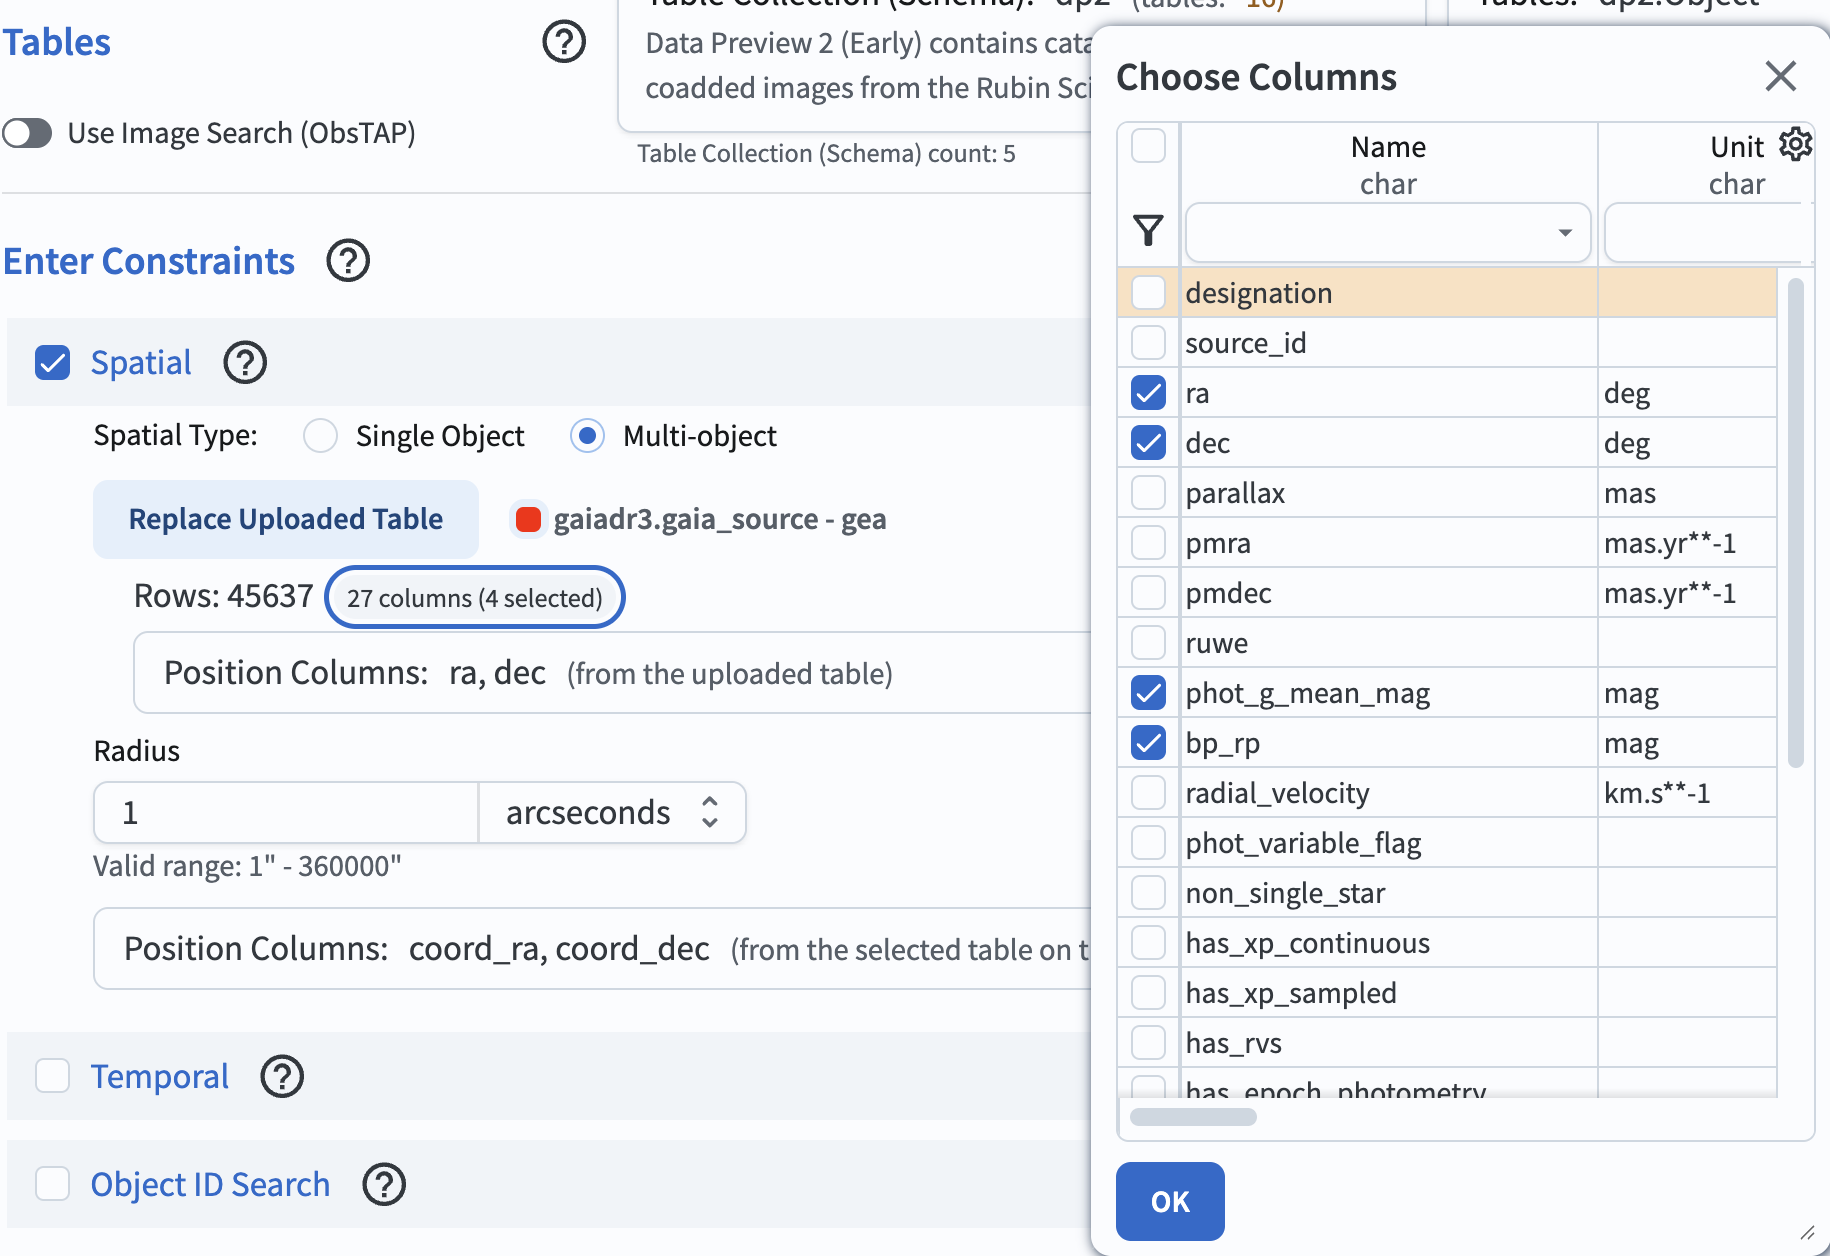
Figure 4: The Portal search interface fully configured prior to execution. The spatial cross-match parameters, the 1-arcsecond search radius, and the additional output columns from the uploaded Gaia table are properly set.#
7. Review the results. The search returns ~100 matches from the user-uploaded table.